
---------------------------------------------------------
I LOVE checking out other people’s chicken set ups! I enjoy seeing different solutions to problems we all face, seeing the creativity people have used in housing & caring for their flock, and getting new ideas for my coop of course.
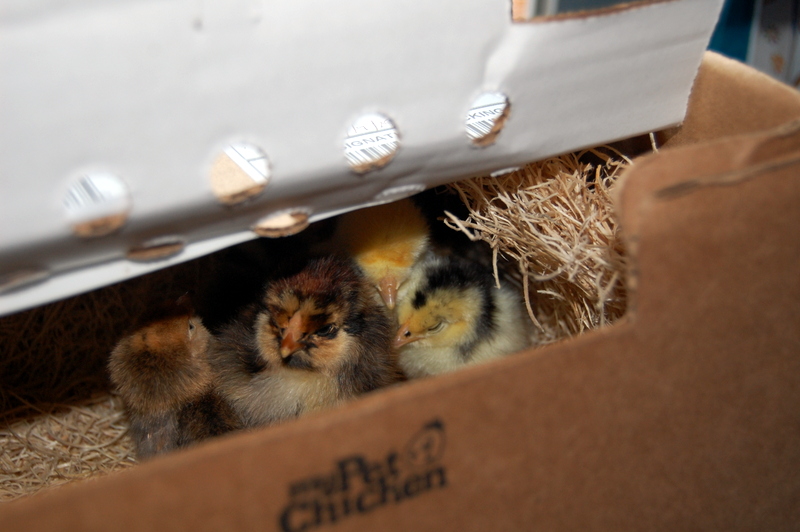
We brought home our first chicks in 2012. Over the years as our flock has grown and changed so has our chicken set up. Our “coop story” very much shows the evolution we have undergone from farming newbies to present day. My husband and I are not necessarily handy, having only moderate carpentry skills. Our set ups have been far from perfect but I am proud of the blood, sweat, and tears we have poured into our homestead. I hope you can find some inspiration here!
Our Coop Story
Our first coop
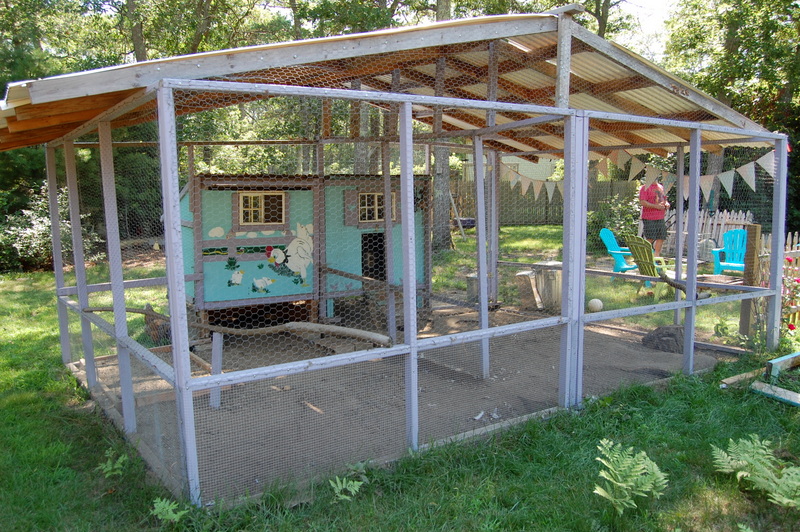
In 2012 when we first built our coop, we had only four hens. We started with a basic 4×4 coop with external nest boxes, with an 8×11 run. We had a large window in front & and long vent in the back, as well as two circular vents on either side. For the front window, we ordered a playhouse window that could open. We installed it backwards (on purpose!) so we could operate the latches from the outside without having to climb in the chicken house. Both the left & right sides of the coop had huge access doors which made cleaning & caring for the chickens fast & easy.
The coop had two huge nest boxes and 4ft of roost space. The run was spacious for four birds and completely secure, it also offered a shady spot under the coop they could relax in. We buried hardware cloth wire 18 inches down all the way around the run. I can’t even tell you the amount of foiled attempts to get in run we had found over the years. Especially in winter, we would almost daily find new holes where critters (mostly rodents) tried to dig into the run but get stopped by the wire. Burying wire was not fun, but was 100 percent worth the effort. click here to read more about keeping rodents out of your coop
The run is 6 feet tall so we could walk in there for cleaning and visiting the girls. The bottom 2 feet of the run walls are covered in hardware cloth and the top 4 feet is covered in chicken wire. It was a good compromise providing predator security and keeping the cost down (I can’t believe how expensive wire is!) The top of the run was covered in chicken wire to protect from hawks.
It was an awesome starter coop but as the hatchery catalogs came rolling in, we very quickly outgrew it. After only a year I was hooked on raising chickens and I knew it just wasn’t big enough. We began to plan our first addition.
The first addition
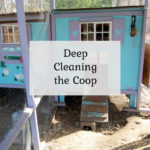
We had already invested so much money in this coop/run set up there was no way we were going to scrap it and start over just one year in. We decided the chickens just needed a home addition! We built a duplicate coop, the same 4×4 coop but without the nest box and connected the two together.
In place of the nest box in the back, the new coop had a large window to bring in light & ventilation. The addition featured a long, horizontal vent on the front side of the coop instead of the backside. When we built the first coop, we hadn’t realized that the back vent was directly next to the roosts. The poor girls had chilly air blowing in at them all winter that year. For the new coop, we put the vent on the front, at the highest point, where that warm, moist air could rise and escape.
We built a duplicate 8×11 run right next to the old one. So now we had a 4×8 coop (plus nest boxes) and an 11×16 run (plus covered area under the coops). We left the wall between the runs up except in one section. It was handy to be able to just close up that section when we need to separate some chickens. It also gave us a conveniently placed wall to support the roof in the middle.
A solid roof for the run
The chicken wire ceiling on the old run was good at keeping predators out, but it was awful in the winter. The weight of the snow on the wire made it sag down. It was so stretched out by spring I couldn’t stand straight in the run anymore. So when we expanded, we opted to cover the entire run with solid, plastic roofing at an angle so the snow won’t pile up. We let the roof extend out at the ends to provide us with a semi sheltered area to keep the feed cans. We added some old branches that had fallen in our property for roosts in the run. At this point, our chickens spent most of the time in the run and only free ranged under supervision because our yard was not completely fenced in.
Coop features
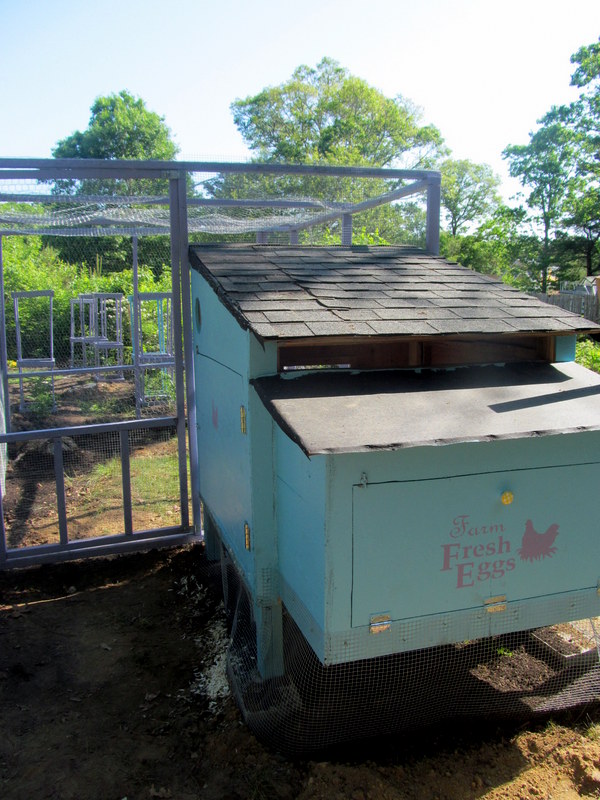
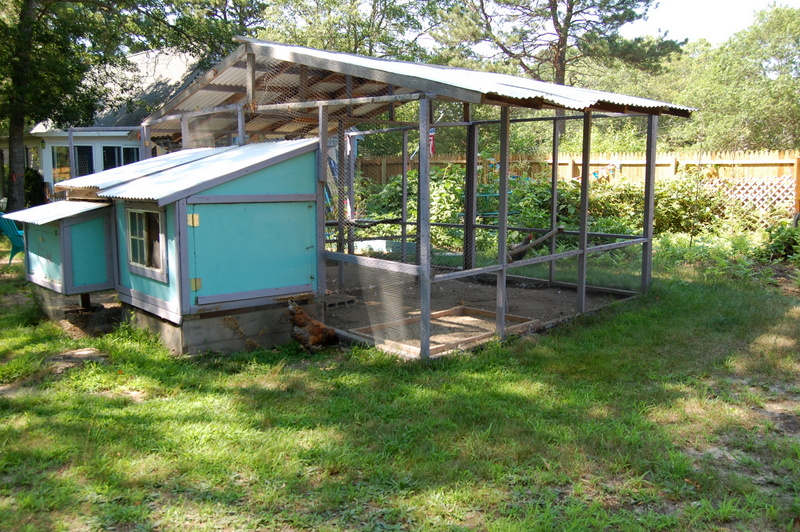
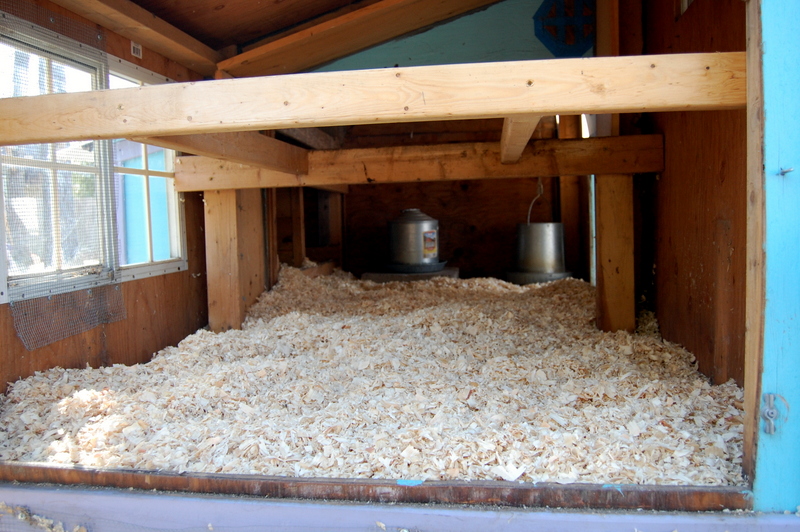
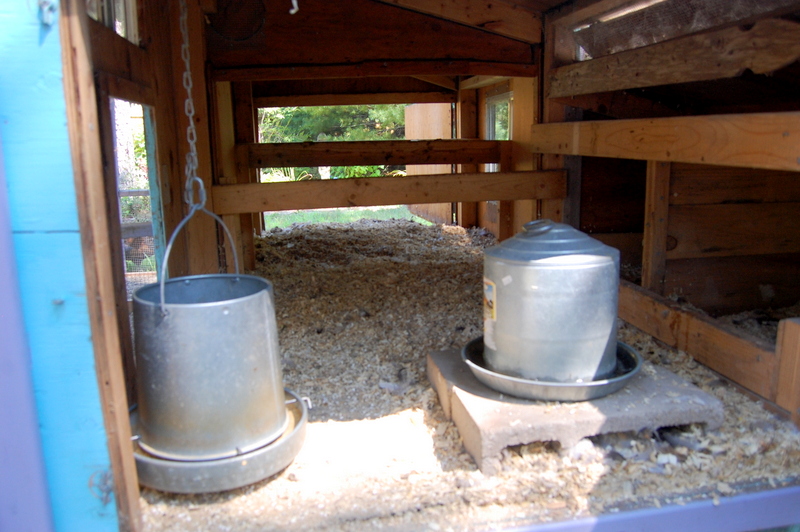
We used cheap peel & stick vinyl floor inside the coop. Vinyl is super easy to keep clean and as they get damaged they are easy to pull up and replace a section without replacing the whole floor. We used the original section of the coop to keep the feed & water and the nest boxes. The new section of the coop is the “bedroom”, it was basically all roost space in there. There is a large, south facing window in the back as well as a second, smaller window in the front.
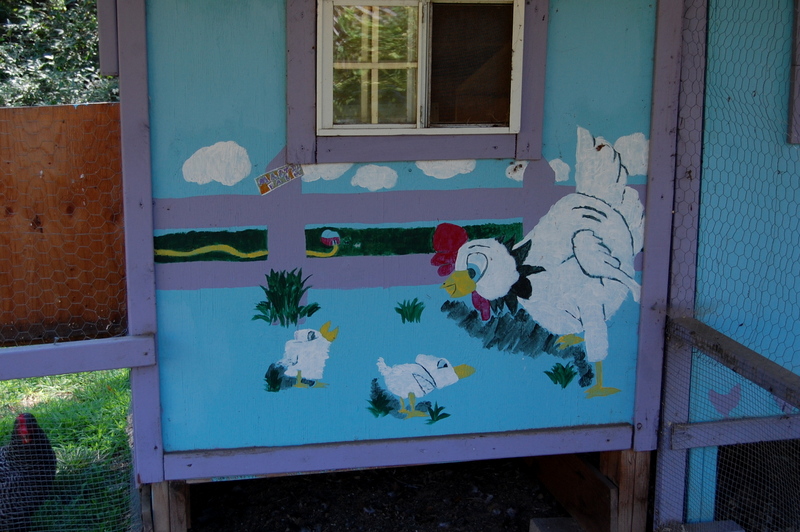
Outside, the chickens have access underneath the coop to a shady, sheltered area. They love to hang out under there in the winter to escape the snow, and in the summer to escape the heat and to hide from driving rain or wind. The original coop’s underside is just wire to let the breeze in, the new coop’s underside still has the wire to keep out predators, but it also has wooden boards to keep out the wind & snow. We painted the coop the same blue color as the original coop and my daughter painted a fun chicken mural on the new section.
The duck expansion
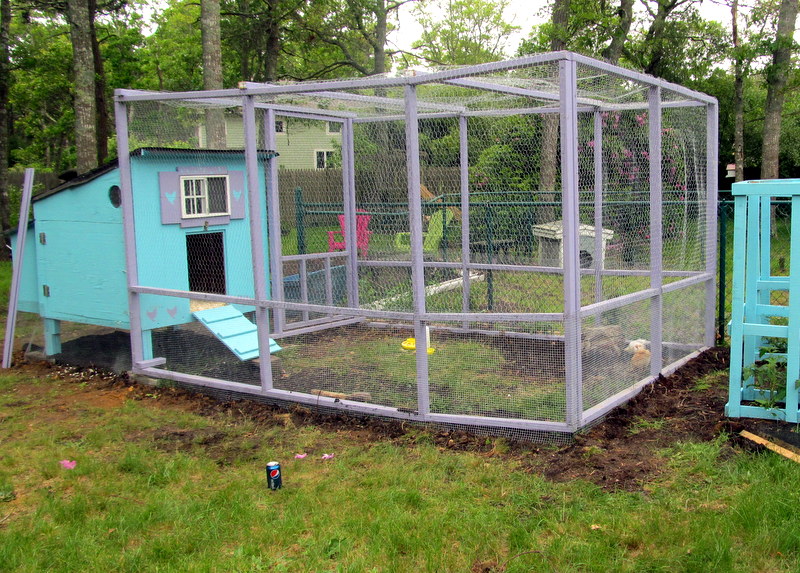
In 2016 we decided we wanted to add a couple ducks to our flock. We planned an expansion to add a small duck house and a “lanai” where we could put a kiddie pool for them in the summer. Unfortunately we didn’t learn our lessons from the chicken math. We built the house big enough for two ducks… and well that was a mistake.
Ducks don’t need anything elaborate for their shelter so we just built a simple square shelter out of materials we had laying around. click here to read about building a duck house
In 2017 we were able to fence in the yard and the entire flock started being allowed to free range the yard for the entire day. This gave us so much more room that we felt alright expanding our chickens and duck flock a bit. The ducks didn’t like to sleep inside, if they had their choice they would sleep outdoors all the time. Luckily our run was secure so they were able to sleep safely in the run. But we were at our absolute max for adding new birds.
The big move
In 2020, we were blessed to be able to buy a small farm with a large barn just down the street from our old house. It was an interesting journey moving with farm animals! The coop & run stayed with the old house. I was a little sad to leave it behind because we had worked so hard on it. But I was excited for the possiblity of starting our set up from scratch with the knowledge of raising chickens for years.
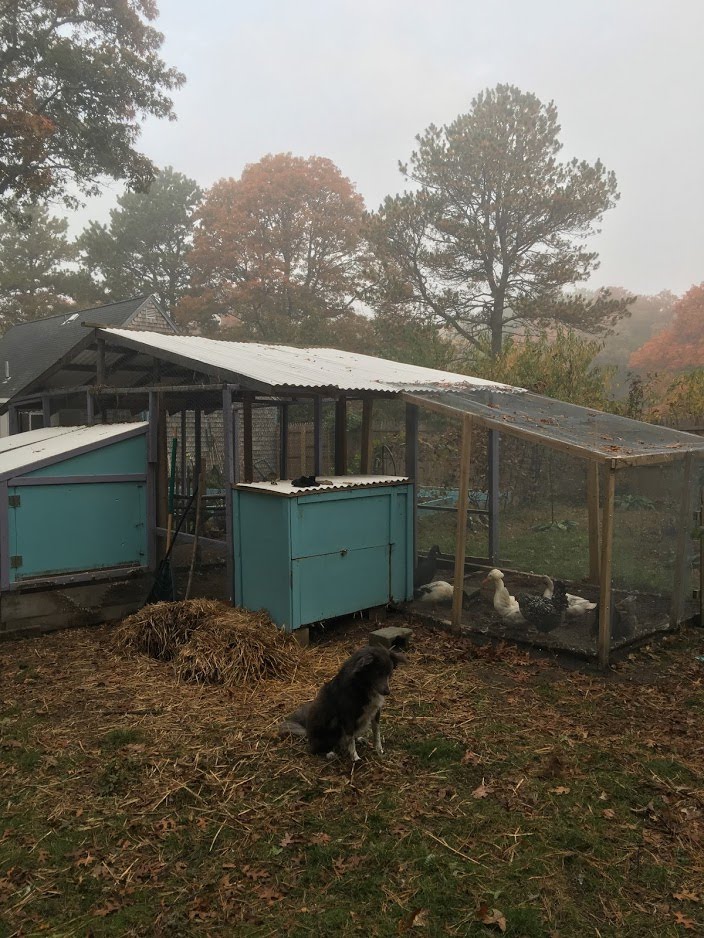
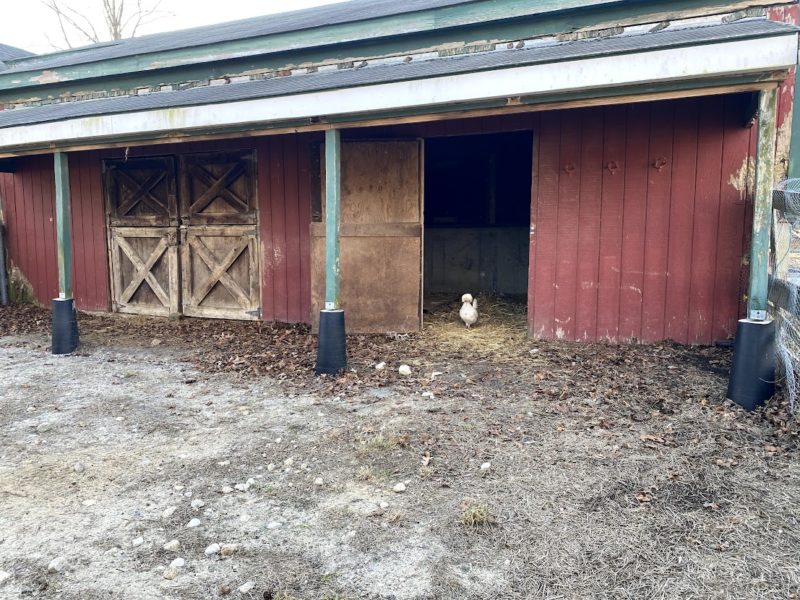
The new house was a former horse farm and came with a 13 stall barn- we now had LOTS of space to expand our chicken & duck family! On the side of the barn was a three stall section that was going to be perfect for a poultry barn. We combined the three stalls and now had a 10 foot by 30 foot space to work with.
Converting a horse barn to a poultry barn
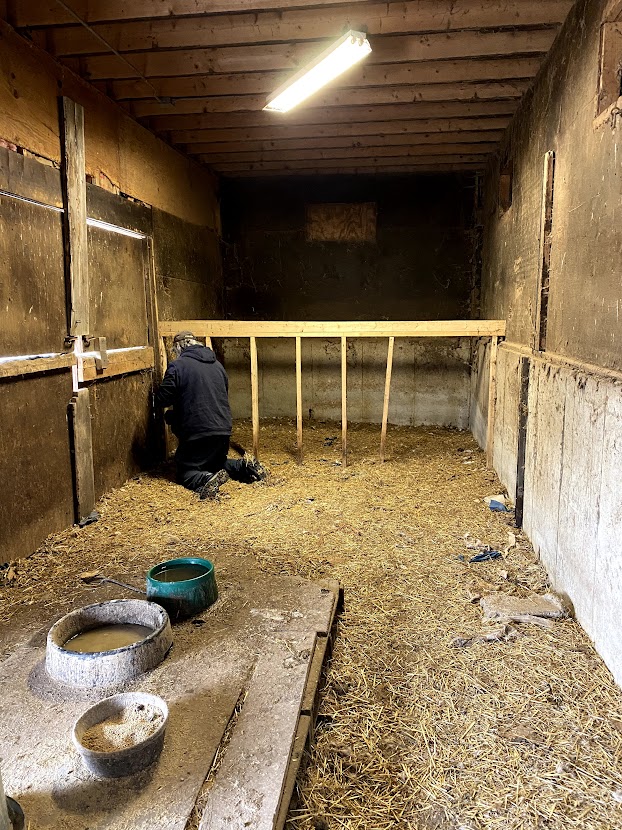
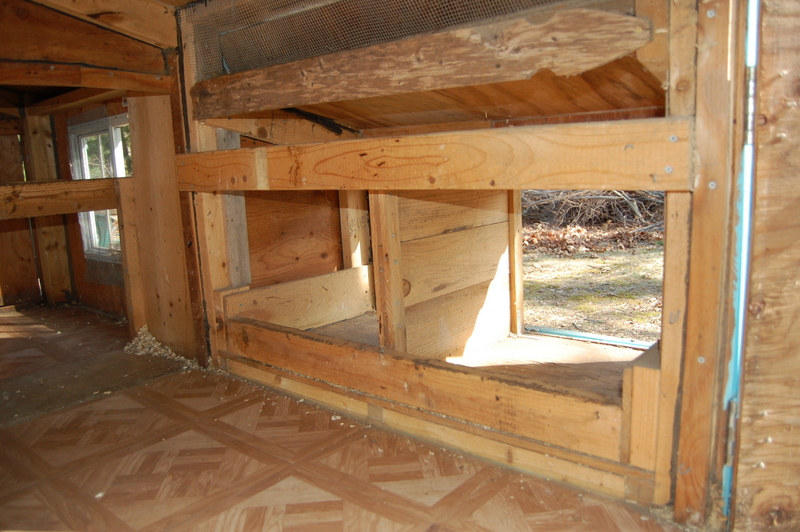
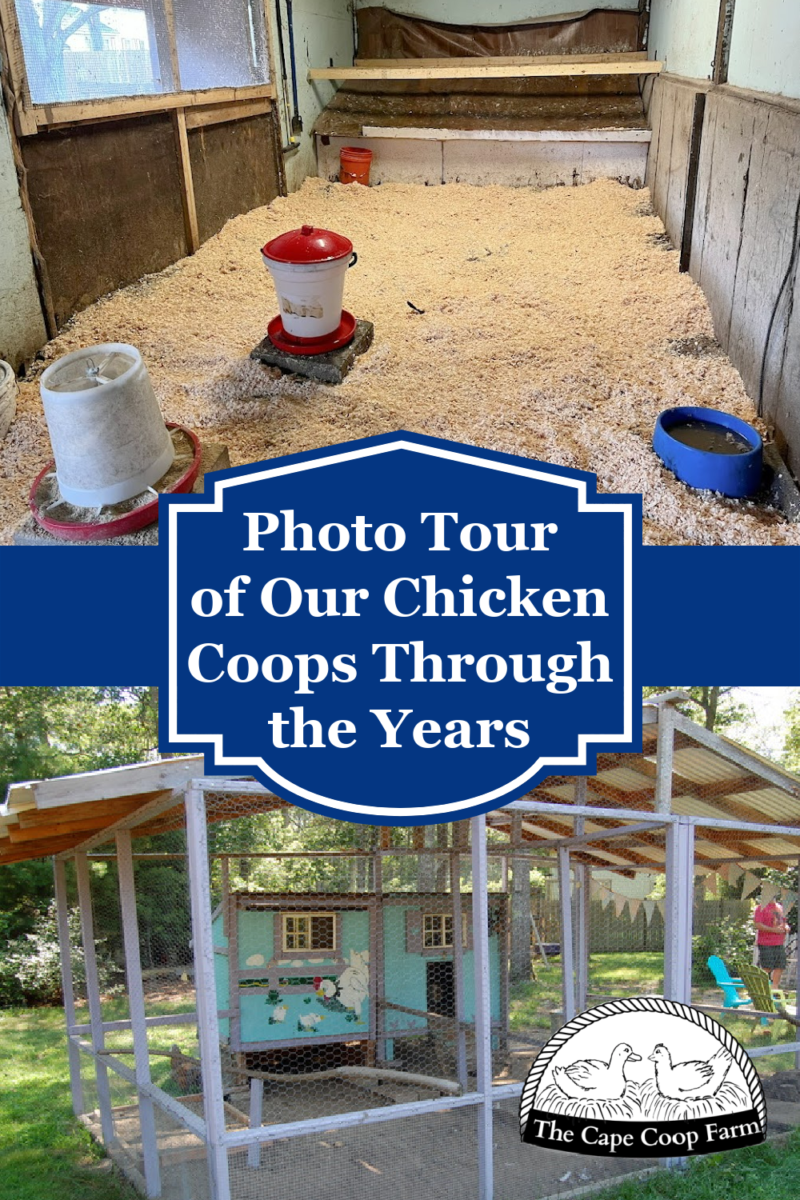
It had been a few years since animals had lived in the coop section of the barn. According to neighbors, the most recent occupants of these stalls were pigs. We started by giving it a good cleaning. We raked up the inside, replaced rotted siding outside, painted the exterior, and stained the doors. We painted the black upper walls with an easy to clean high gloss paint in a light blue. The lower parts of the walls are concrete. I would like to someday seal or paint these, but that is not a project we have tackled yet.
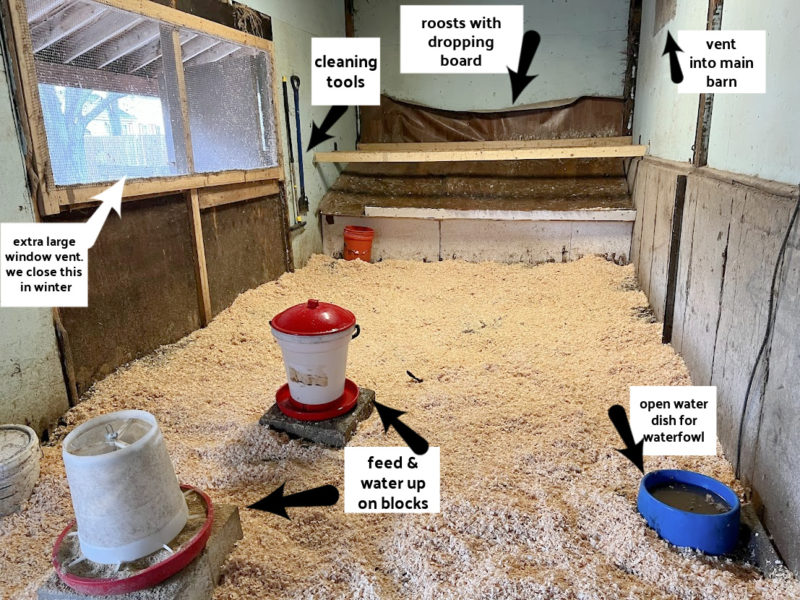
Now we just had to outfit the barn for poultry! The space has a single and a double set of dutch doors. We only needed one entrance to the coop so we boarded up the double set of doors on the lower portion of the door. For the upper portion we installed a hardware cloth screen so we could open the upper doors for ventilation. There is also a tilt out window on one end and three large windows that open to the main barn for additional ventilation. We covered all the openings with hardware cloth.
We built nest boxes on one end, with some for chickens and larger ones for ducks below. click here to learn about building nest boxes. On the opposite end we install three 10 foot roosts, plenty for our current flock and room to expand if we decide to. Underneath the roosts we installed a slanted dropping board to collect the poop as the chickens sleep. This is probably my favorite addition to the coop. Every day I can just scrape off the board into a bucket. It keeps the coop floor so much cleaner! click here to read more about dropping boards
We have the feed & water in the middle of the floor raised up on concrete blocks. There is a conveniently located electric outlet where we can plug in our heated pet bowl in the winter. Having electric in the coop also enabled us to be able to install a security camera in the coop. I can now check in on my birds right from my phone anytime!

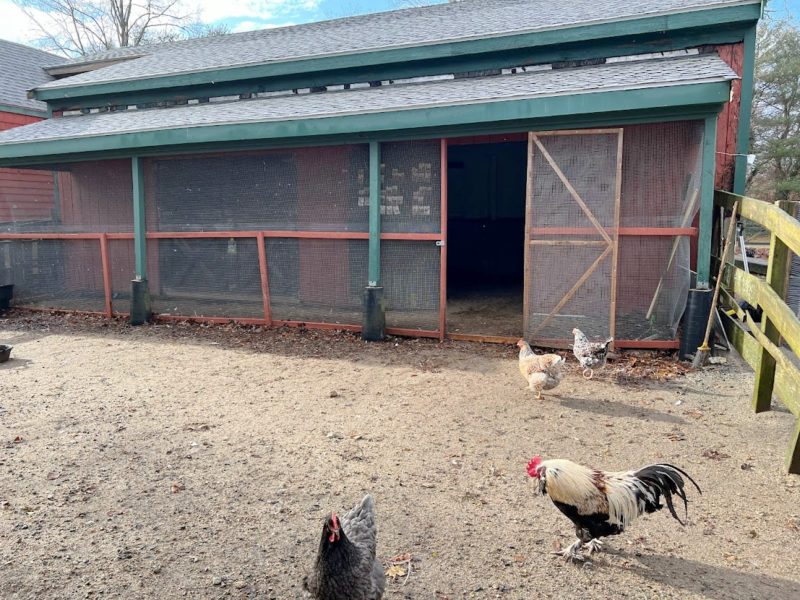
Our birds free range all day long so having a chicken run wasn’t completely necessary so we were not going to build one. But when bird flu became rampant in 2022 we needed to have a run so we could keep our birds safe. Luckily the chicken barn had an existing overhang. We simply had to add some hardware cloth walls and a door and we had a safe outdoor space for our birds!
I hope you have found some inspiration for your own set up in our crazy homesteading journey! I’m excited to see where the future will lead us.


Harold
Thursday 15th of October 2020
I have question? I had 3 chickens at the beginning, 2 died, so I only had Coco- so I brought 2 more, well another one died, so that left Coco and Rita, well low and behold Coco will not let Rita in the pen with her. So now I have a small coop for Rita and Coco gets to run around and Rita seems happy, but it's not fair, Coco is all black an Rita is golden, its OK! With Rita, I have their chicken Run right next to each other, now it is going on 3 months and winter is about to come soon and I have the large coop almost finished, so what do I do to join them, I have tried to put them together , but Coco will not have it.What do I do to make it fair for Rita. Although she seems fine but her coop is small.????
Liz
Friday 16th of October 2020
Hi Harold, poor Rita! It's hard to say why Coco is being so difficult about her new friend. But you have given them a really long living side by side introduction period and at this point you have to let them work it out with each other. There will likely be a bit of fighting, pecking, or chasing. They need to figure out who is in charge. My guess is they both really think they should be in charge. I would let them out in the run together during the days for 4-5 days in a row. Let them get used to living in each other's space. Let them fight it out if need be. I would only separate them if one of them is bleeding, injured, or is being kept from the food & water. After the 4-5 days of daytime living together it's time for them to share a coop. Be sure to get up very early to open to the door and let them out the first few mornings. They both really will need someone to huddle with in the winter months to keep warm, so you are right it's a good idea to get this done now. good luck!
Jaren Wiebe
Tuesday 18th of August 2020
i like those pictures
Maria
Monday 4th of December 2017
Love the name. Great design and execution! The inside also looks well thought out. Wish you all the best with this coop. http://buildacoop.com -Maria